In the previous part, we learned about the cPanel home-screen, sidebar and files section. Today we will discuss the Database Section.
If you have not seen the previous part, you can see it from here.
cPanel Guide for the beginner (cPanel Part-1)
How to Upload, Delete and Edit a file on your site through cPanel? (cPanel Part-2)
Database

- php MyAdmin
- MySQL Database
- MySQL Database Wizard
- Remote MySQL
php MyAdmin
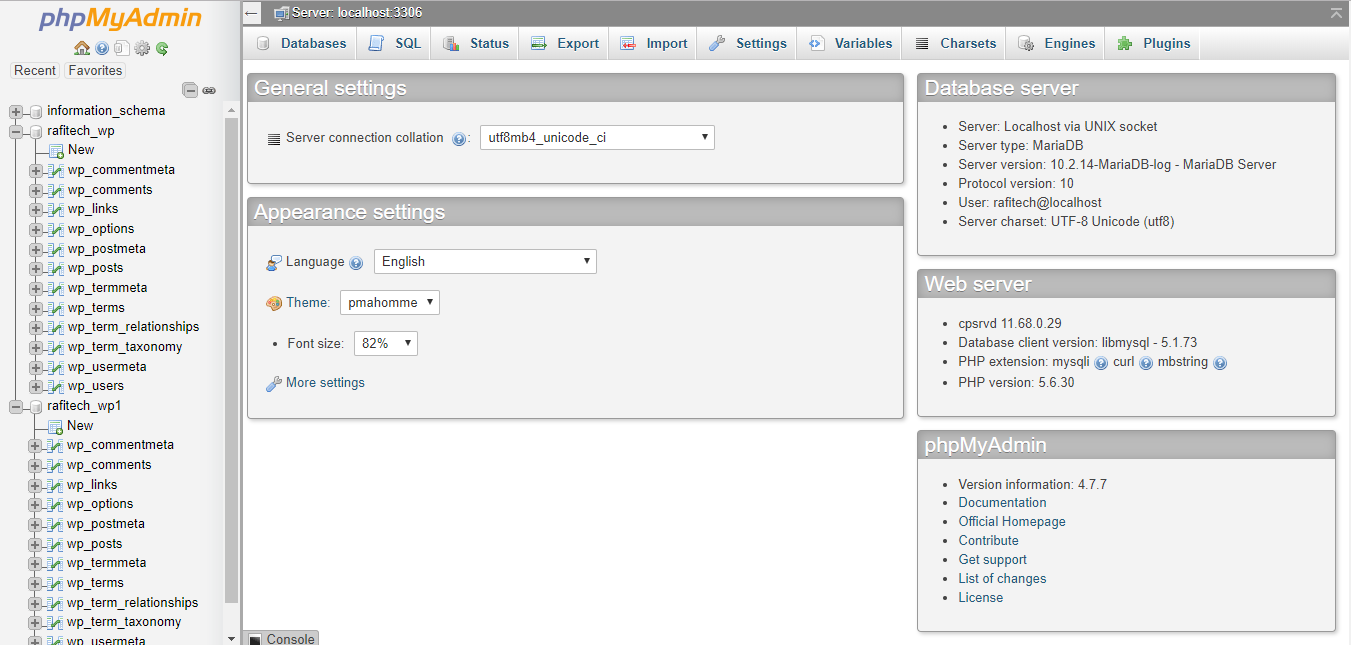
We are familiar with those websites and localhost, almost everyone is familiar with php MyAdmin. You can see all the files in your database from here, create a new database and check the status of the database. Also, you can export and import your database.
MySQL Database

If you want to create a new database, you can create a database from here. The new database will be created by typing your database name on the new database section and clicking on Create Database.
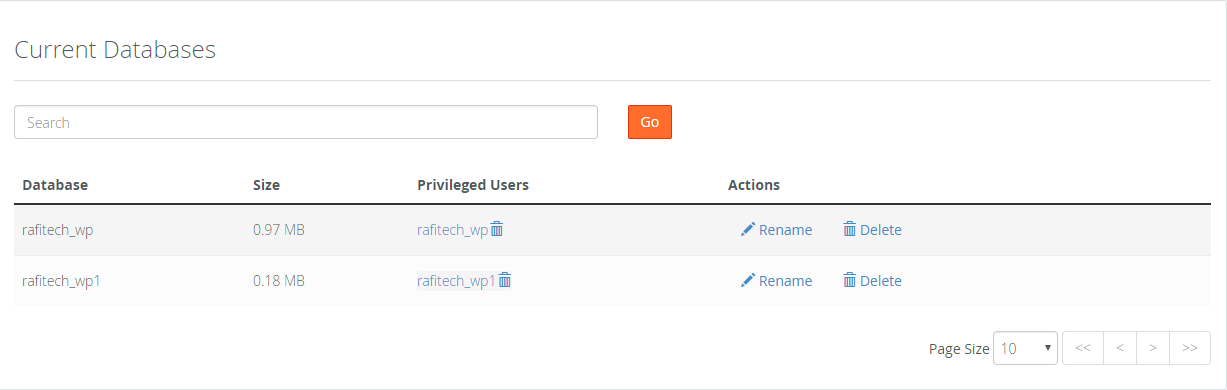
Here, you will find your all database which you have created. From here you can change the name of the database or delete it as desired.
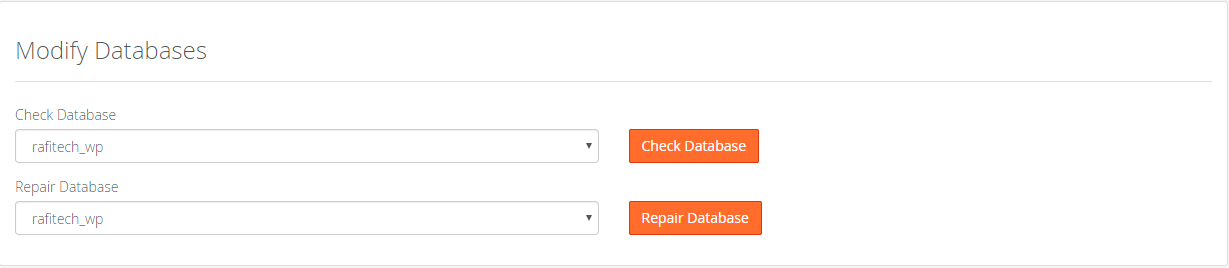
From here, you can check if there is any problem with your database. If there is a problem, clicking the Repair button from the bottom will be automatic repair.
MySQL Database Wizard
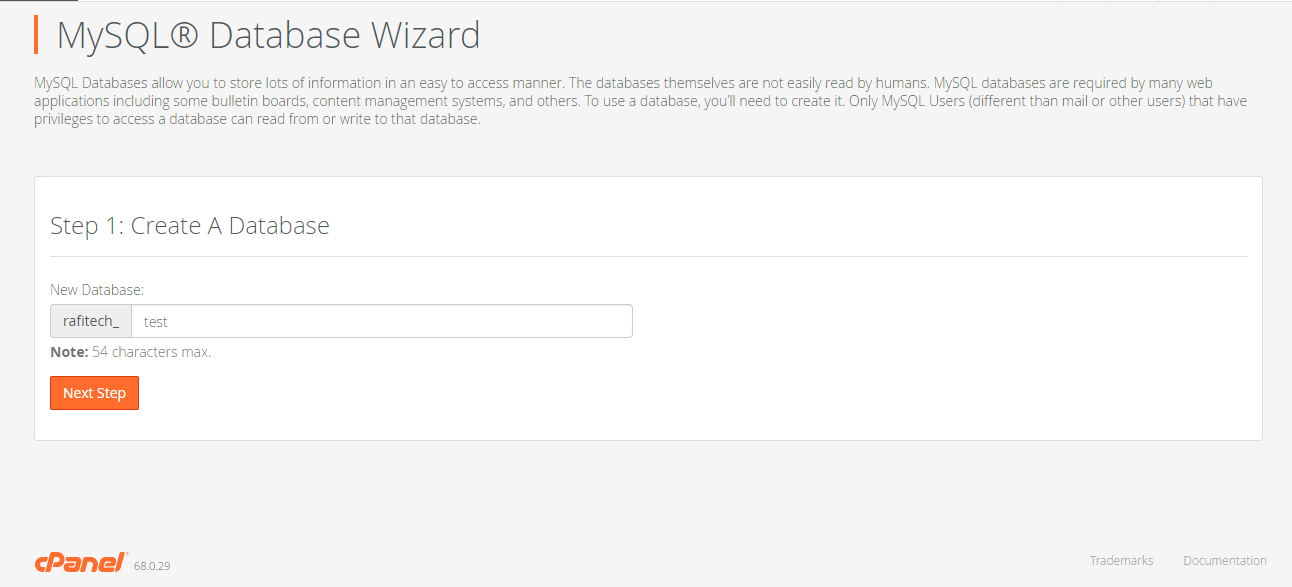
After clicking here you will see step by step how to create a database. Just you need to type all information and click to Next Step button for creating a database.
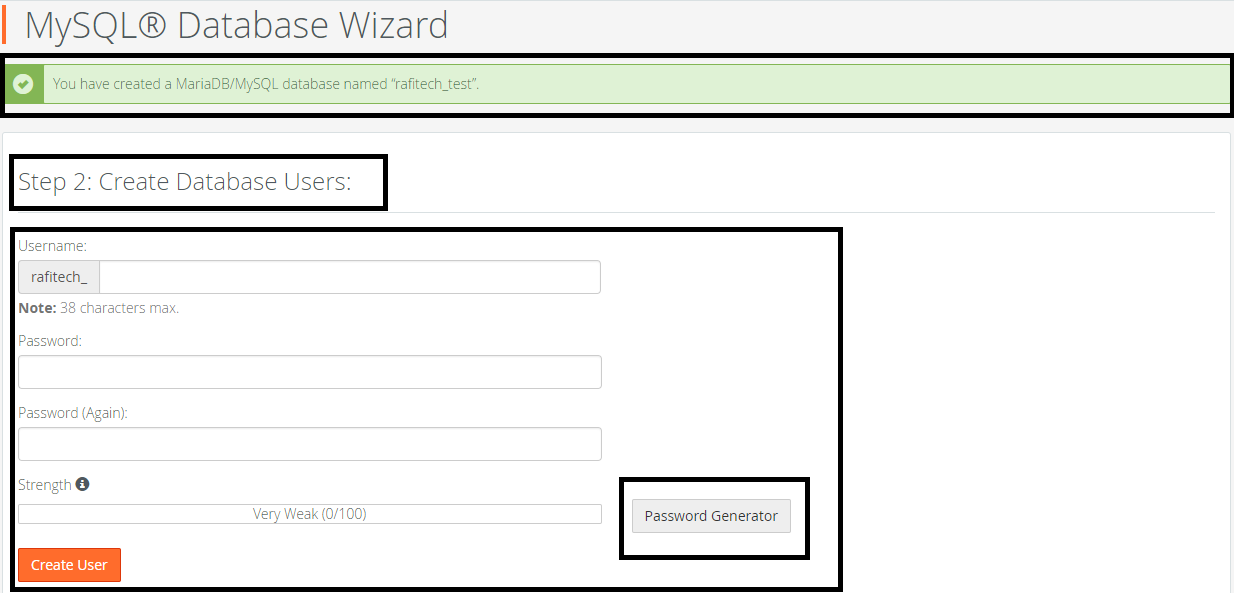
I just created a new database for test purpose. In the next step, you will need to click Create User with your username and password.
Remote MySQL
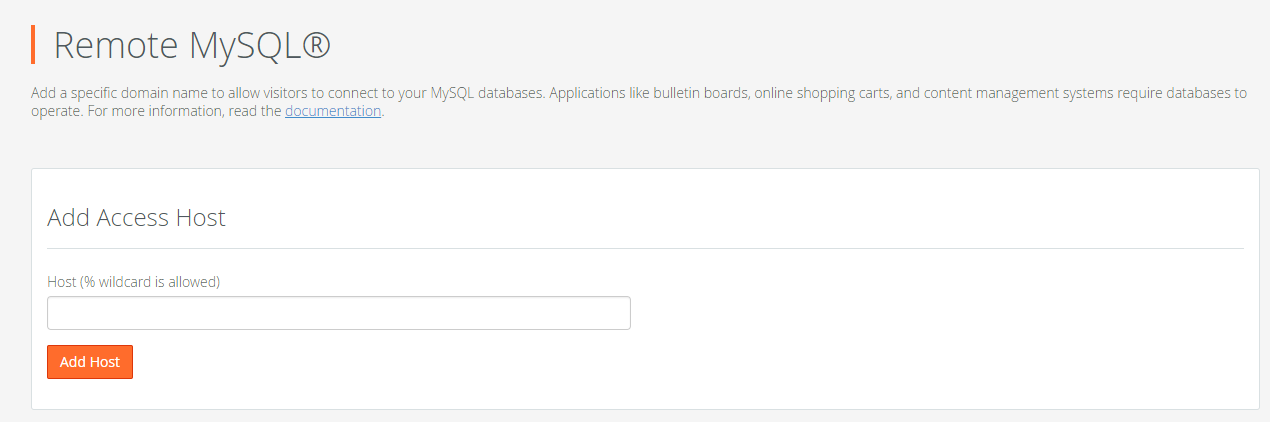
If you want, someone controls your database remotely and you give it access to the database, then you can do it with the help of Remote MySQL. Enter Host Address (IP Address / FQDN) and click on Add Host.

From here you can view your access host and delete it if desired.
In the next part, we will discuss the Domain Section of cPanel. To get the next part of cPanel, please stay with Tos Blog.
We provide a multi-language, user-friendly control panel (cPanel) with all of our hosting plans. If you want to see our pricing plans, you can visit our hosting panel and if you want to buy a cPanel, click here or you can contact us.
To get amazing offers and new tech updates, please stay with Toshost.